
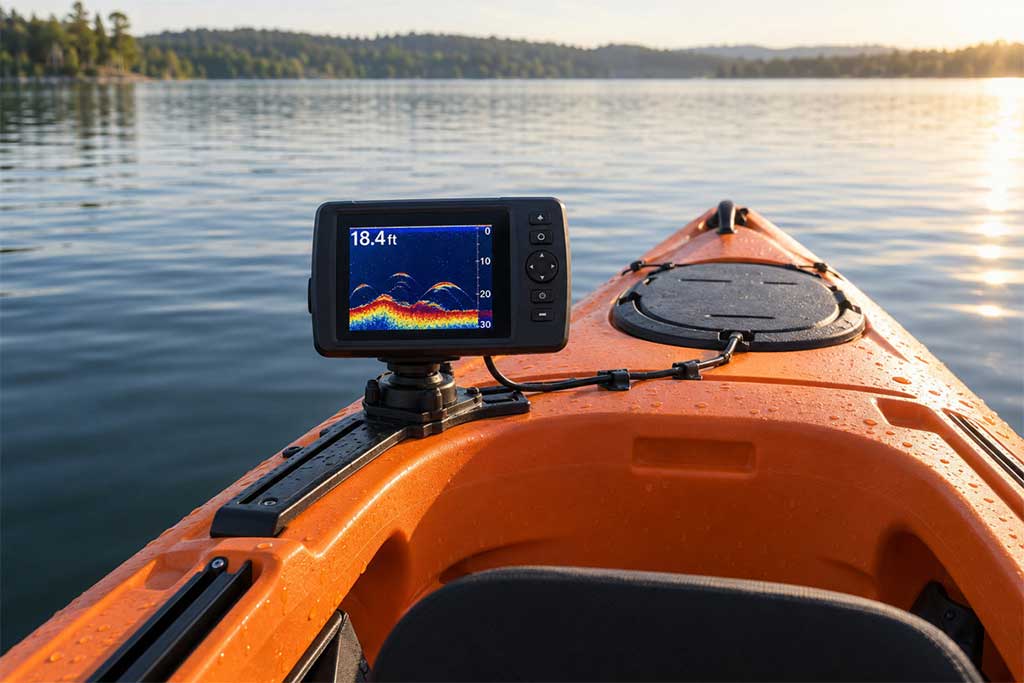
Learn how to select, install, and operate a fish finder on your kayak to maximize your fishing success. This article covers practical considerations, layout tips, cable routing, mounting scenarios, setting adjustments, and maintenance for reliable, productive kayak fishing.
A modern fish finder can be a game-changer for kayak anglers seeking better catch rates, but getting the most from your investment takes careful planning. Mounting a fish finder on a kayak opens up a wealth of information, such as depth changes, underwater structure, bait presence, and temperature cues, that can change how you find and target fish. Because space and stability are limited on most kayaks, your choices in setup have a direct impact on both your results and safety.
Ways a fish finder adds value on a kayak
Out on the water, kayaks drift and paddle over ground slowly, making them ideal platforms for interpreting sonar returns in detail. A fish finder helps you pinpoint depth changes and submerged structure, such as rock piles, weed edges, and drop-offs, which are often magnets for bass, crappie, and walleye. For example, when you approach a submerged point that transitions from gravel to mud, the fish finder can indicate both the depth shift and the associated bait activity, helping you decide where to cast.
The device can also reveal bait schools and indicate subtle temperature differences that affect fish positioning. Using water temperature readouts, you might notice a cooler patch where fish tend to hold during hot summer days. Many kayak anglers track these micro-changes to make on-the-fly decisions about lure choice.
It is important to set expectations, however. While modern sonar can show arches representing fish and highlight features on the bottom, you will not get a crisp “picture” of every underwater object, especially when moving fast or in thick vegetation. For example, a patch of floating weeds may create noise on your display. Interference from waves and hull movement is common, so knowing what your particular model can and cannot reveal keeps frustration at bay.
Selecting the best unit and transducer for kayak use
Kayak anglers typically look for compact, lightweight fish finders with clear screens visible in sunlight. A screen size of 4 to 7 inches is a common range, balancing readability and space management. On most sit-on-top kayaks with molded console space, a 5-inch display often fits best just in front of the seat, while smaller units work well closer to the gunwales or gear tracks. Battery draw is a real concern; smaller screens and fewer functions consume less power, which can translate to longer sessions on the water before recharging.
When it comes to sonar, simple 2D units are often enough for reading depth and bottom composition. Down imaging adds definition directly below the hull and is useful for locating structure beneath drop-offs. If you fish in shallow lakes with scattered rock piles or brush, down imaging can clarify what’s below. Some newer fishing kayaks support side imaging, though these transducers may be larger and require more careful placement to work properly. For example, with a wider hull or built-in transducer scupper, side imaging can be integrated for more comprehensive views of structure on both sides of the kayak.
Planning before installing your fish finder
Before drilling holes or sticking mounts, think through the effect of added equipment on your kayak’s performance. Place the unit where it is easy to read but does not obstruct your paddle stroke or snag fishing lines. For instance, on a kayak with a raised seat, mounting the display just forward and slightly to the right can allow for hands-on adjustments while paddling or casting. Weight distribution matters; a battery or heavy mount placed far to one side can cause balance issues, so try to keep heavier components close to the kayak’s centerline.
Cable management is another key point. Run wires so they stay clear of footwells, rudder pedals, and standing areas. Some anglers tuck wires under gear tracks using adhesive-backed clips or route them through existing hatch covers where possible. Use zip ties, cable covers, or channels to keep everything tidy and reduce tripping or tangling risks. Removable mounts let you quickly detach electronics for transport or storage without undoing a tangle of wiring.
Where to mount the display and transducer: options and tradeoffs
Most displays are placed just ahead of the seat or on gear tracks within reach, allowing you to adjust settings and mark waypoints. On kayaks with built-in tackle trays or side consoles, placing a compact unit off to the side but within arm’s reach can free up legroom. Console areas, if present, can protect screens from sun glare but may restrict your view of electronics if you like to stand and fish.
Transducer mounting is a more technical choice. Three standard approaches are common:
- Inside hull install: Glued to the inside bottom with epoxy or putty, provides protection but can reduce sensitivity and will not work for side imaging. For example, on a polyethylene hull with a flat section under the seat, this can be a safe spot for epoxy-mounting a 2D transducer.
- Scupper-mounted: Special transducers fit into scupper holes, exposing them directly to the water for clearer readings, but may get in the way during launching or beaching. Some kayaks have scupper holes sized specifically for certain transducer models, simplifying installation.
- Over-the-side arm mounts: Position the transducer directly in the water, easy to remove, but more susceptible to knocks and damage from submerged obstacles. This setup is useful for inflatable kayaks or when multiple kayaks are used, since the arm and transducer can be quickly swapped between boats.
Powering your fish finder: basic setup and care
Most fish finders on kayaks run on small 12V sealed batteries, kept in waterproof boxes or pouches under the seat. If you are comparing the best battery setup for dependable run time, a common arrangement is using a 10Ah lithium battery inside a plastic dry box, with cables routed through a waterproof gland into the hull. This protects the battery and makes charging simple. Lithium batteries offer longer run times at lighter weights, though sealed lead-acid is still common for the budget-conscious.
All electrical connections should be kept dry, so use marine-grade connectors, dielectric grease, and shrink tubing where wires are exposed. Quick disconnect fittings make it easy to remove your unit at the end of a session, while simple inline fuses help prevent surge damage or shorts in wet conditions. Labeling the main power leads with tape or shrink tubing can simplify troubleshooting if a problem arises on the water.
Settings and interpretation tips for practical use
For best returns, adjust sensitivity so you can easily see both bottom returns and fish arches without too much surface clutter. Slower chart speeds may be better for slow drifts, while higher settings make sense for covering ground. As an example, if you’re slowly working over a rocky shoreline, reducing chart speed can provide a clearer picture of changes in structure. Experiment with frequency options; higher frequencies can show more detail in shallow areas, while lower ones can penetrate deeper water and heavy cover. Switching to a 200kHz frequency while fishing weed beds in six feet of water often produces sharper images of fish holding near the bottom.
Learning to distinguish bottom hardness, dense vegetation, and baitfish balls comes with practice. Look for clear arches or lines above the bottom for fish, and pay attention to how readings change as you pass over structure. If the bottom line thickens and turns a brighter color on your unit, it typically indicates harder ground such as rock or rubble. Bait balls often appear as dense clouds on the display, while large fish can be identified by individual arches within or near these schools.
On-the-water adjustments and common maintenance
Kayak anglers often rely on their fish finder to mark drop-offs, submerged logs, or weed edges, prime spots for setting anchor or making repeated drifts. For example, when paddling along a submerged ledge near a creek channel, marking a waypoint allows you to revisit the location on later trips. Waypoint functions are handy for logging productive spots to revisit later. Wind and current can shift readings rapidly, so be ready to reposition the kayak or adjust settings on the fly.
To keep your fish finder running smoothly, rinse all components with fresh water after every trip. Inspect brackets and mounts for cracks, and check that all cables remain free from wear and bending. Before each season, test your battery and clean the terminals, ensuring seals or gaskets are intact. Typical quick fixes include reseating connectors, tightening battery leads, or adjusting sensitivity if you encounter weak or noisy readings.